 As we discussed previously, Cisco created the Nexus Operating System (NX-OS) to power its next-generation data-center switching platform. While this new OS shares many similarities to the original IOS, there are some definite differences that you need to be aware of as you begin using it.
Differences
Interface Naming Conventions
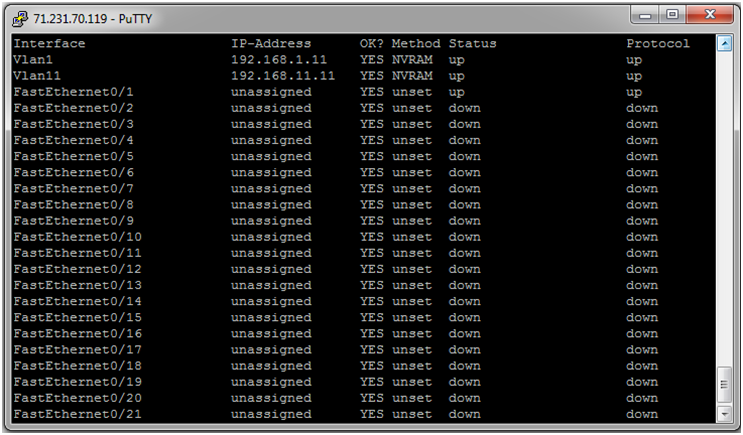
On LAN interfaces, IOS uses the interface speed as part of the name or type of interface on the device, usually the highest supported type on the device. As an example, the IOS-based switch below has Fast Ethernet interfaces supported, as follows:
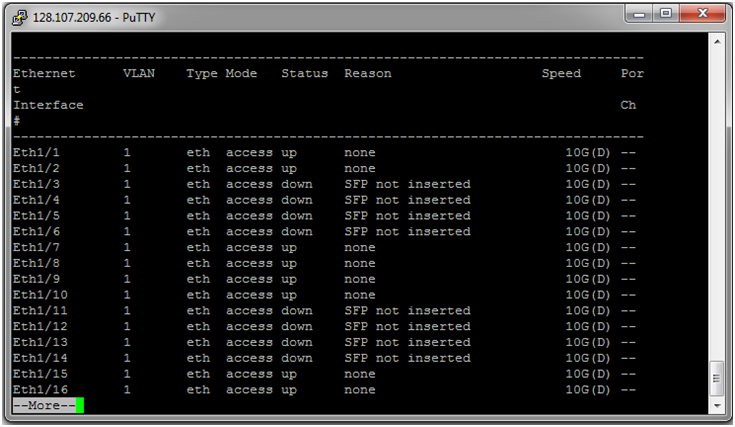
The LAN interfaces on this switch are referred to as Fast Ethernet 0/1, 1/1, and so on, and would be represented as Gigabit or Ten Gigabit if the LAN ports supported that speed. Contrast that with the Nexus display of interfaces, as indicated below:
Not only is the display format different, but the way that the Ethernet interfaces are referenced simply as Ethernet. When you first work with Nexus switches this can require constant reminders to oneself when the command line indicates an error when referencing interfaces.
Saving Configurations
In reality, the process for saving configurations — moving the changes in the running-config to the startup-config — is simply a matter of using the very familiar command copy running-config startup-config. This is the exact syntax on both platforms, but many of us as engineers have relied on the write memory/wr mem command to do that instead. Even though I have been warned for years that this command was being deprecated, I still fuss when I cannot use it.
Exec Modes
In the preceding section I pointed out that both platforms use identical prompts in privileged mode, but one important difference is that Nexus switches do not have a simple user exec mode (with the format hostname> prompt). When you log into a Nexus switch, you will see two differences. The first is that you will be prompted for usernames and passwords even by default (rather than simply an enable/exec password). Second, when you successfully authenticate, you enter what IOS called privileged mode immediately, without the use of the enable command.
Feature Modes
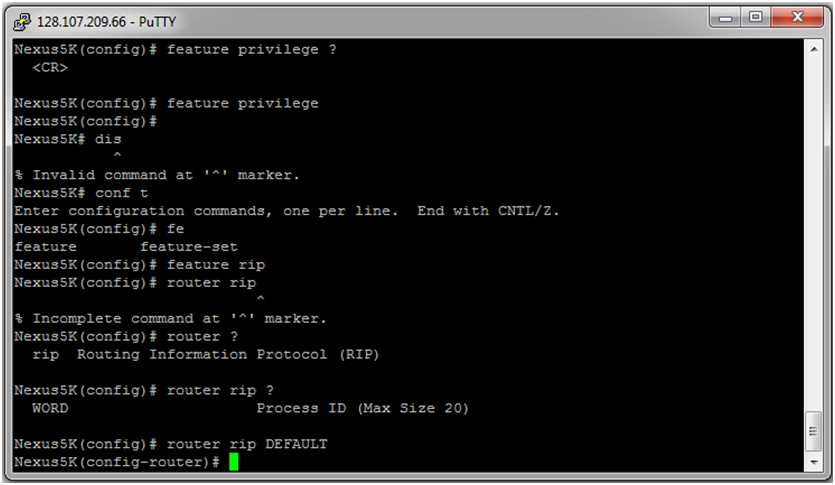
In IOS, you enter into global configuration mode and then shift to other configuration modes as needed to complete specific tasks. These include line configuration (console and virtual terminal), interface (various tasks), and routing (for the desired protocol). In order to run a routing protocol, you first have to enable it using the feature command, as displayed here:
Notice first that starting the process for RIP required the feature to be enabled, and then the specifics of the protocol can be configured for operation. Each protocol has to be enabled as a separate feature before use.
Access-Lists
Access-lists have been a part of Cisco IOS devices from some of the earliest versions of the operating systems. Two basic IPv4 access-list types most commonly used by Cisco engineers are as follows:
| Numbered Standard Access-Lists: | Filter by source address(es), 1-99 |
| Named Standard Access-Lists: | Filter by source address(es) |
| Numbered Extended Access-Lists: | Filter by source address(es), destination address(es), protocols, port numbers, etc. (100-199) |
| Named Standard Access-Lists: | Filter by source address(es), destination address(es), protocols, port numbers, etc. |
In the NX-OS world, there are no numbered access-lists, and the distinction between standard and extended is done away with. Configuration is done with named access-lists only with permit/deny actions created in config-acl submode.
Some of the differences run even deeper as you get into virtual device contexts, specific models (the Nexus 5010 is a L2-only device, with the Nexus 7000 having L3 capabilities), but this can give you a good idea of how to start.


 Worldwide Locations


